
The Meccano Relay Board
By Gilbert Ghyselbrecht
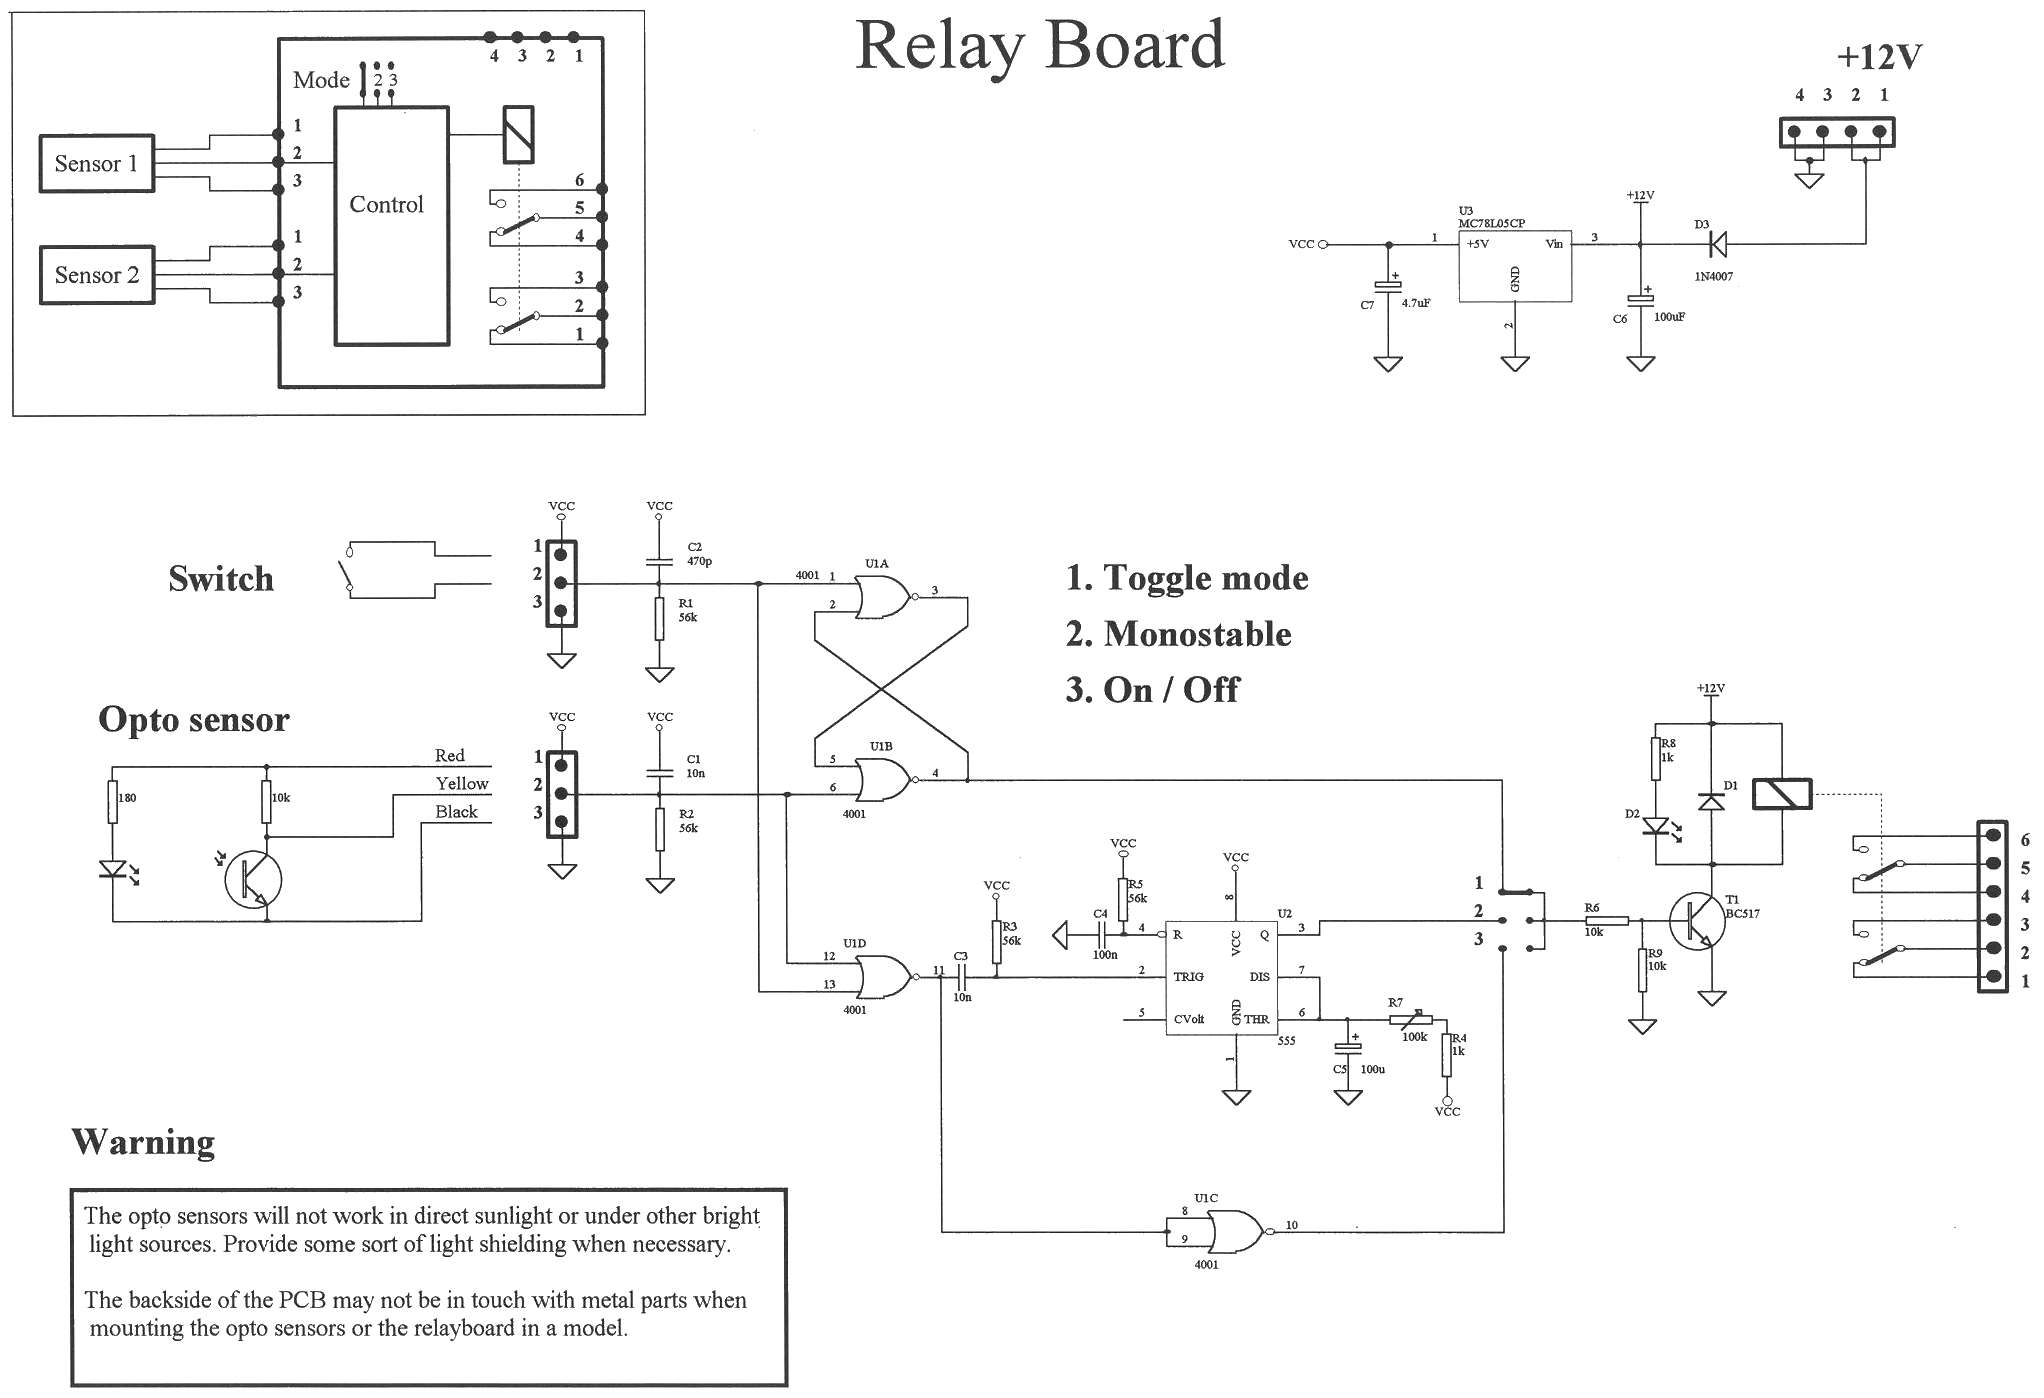
In response to the call for some practical examples of the uses of electronic circuits in Meccano models, I have developed a system called the Meccano Relay Board which provides modellers with several simple means of controlling their motors. In addition, I have designed three mechanisms which make use of this board, and these mechanisms will be the main subject of this article.
The Relay Board
| Enlarge to 640x480 | Enlarge to 1024x768 |
My relay board is in the first place intended to work with one or two of the slotted opto-switch modules which I have used in my Cliff Lift model, but it is also possible to use micro switches.
| Further Information | A Cliff Lift - Includes a description of slotted opto switches and a photo of the module mentioned above |
The circuit is built on a printed circuit board with the dimensions of a 5 x 7 hole Meccano plate. Connections to the board are made using screw terminals, and the power supply for the board is 12V DC.
The motor to be controlled is connected to a relay on the board which has two individual N.O. - N.C. contacts with a switch rating of 5A 250V AC.
The board can be configured by a jumper link to work in one of three possible modes:
The circuit diagram and PCB layout of the relay board are available to download from the links below. You could build the circuit on stripboard, but a better solution is to etch a PCB if you have the facilities available to do this.
| Downloads | Full Circuit Diagram - GIF image format (311kb) | |||||
| PCB Design - PDF format (440kb) |

Solder the components to the board in the following order:
| Video Clips | The Three Sample Mechanisms - Windows Media format (1.63Mb) |
A crank (Meccano part 62) is fixed to an axle rod, connected with or without gears, to the driving motor of the model. A push button is used to start the movement. The crank turns and will interrupt the light beam in an opto-switch. This will stop the motor. The relay board is here used in mode 1 (toggle).
When using the relay board in mode 2 (monostable), with the same mechanism, the motor will turn intermittently. The stop time is adjustable.

Mechanism 1
| Enlarge to 640x480 | Enlarge to 1024x768 |

A bush wheel (Meccano part 24) is taped to cardboard and one or more holes are left open. The wheel turns in the gap of the opto-switch. The sensor is connected to a relay board configured in mode 2 (monostable). The output of the relay can be used to switch other motors or lamps etc.

Mechanism 2
| Enlarge to 640x480 | Enlarge to 1024x768 |

Here I use two opto-switches connected to a relay board in mode 1 (toggle). The motor is connected to the relay output and turns right, then left, then right and so on.

Mechanism 3
| Enlarge to 640x480 | Enlarge to 1024x768 |

Article Information
Source: Electronics in Meccano - www.eleinmec.com
| First published in EiM: Issue 11 (April 2001)
Topic: Model Studies |
Created: 11/02/2007 |
Last modified: 02/11/2007
Top of Page | Homepage | About | Search | Topics | Features | Circuits Shop | yourEiM |
© 1998 - 2024 Tim Surtell |